Using Excel for weather data
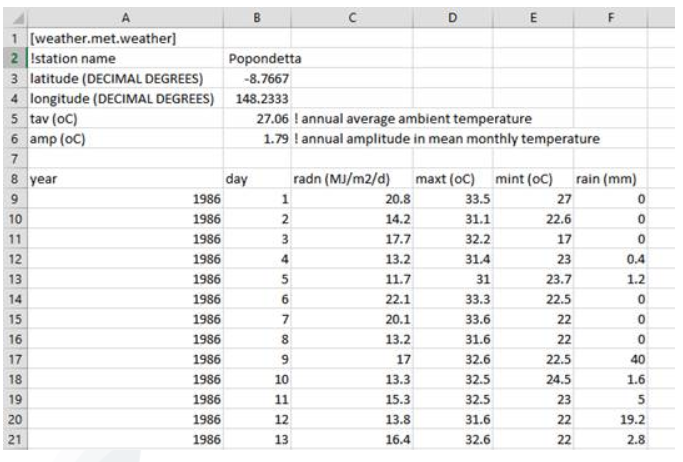
It is possible to store met data in an excel ‘.xlsx’ file. The format of the worksheet is represented below
Each excel file can contain multiple worksheets, and they don’t all need to contain met data. This allows for weather data to be combined with other relevant data, into the one file.
Converting met data to the excel format:
- Copy and Paste the met data into excel. If your file doesn’t look like (ie, it is automatically split into columns), this then you may need to close excel and start again.
- Click on the cell that contains the ‘year’ (A8), hold down the Shift, Control and the Down Arrow to highlight all of the weather data.
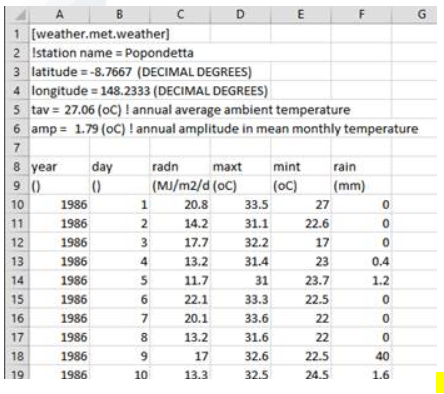
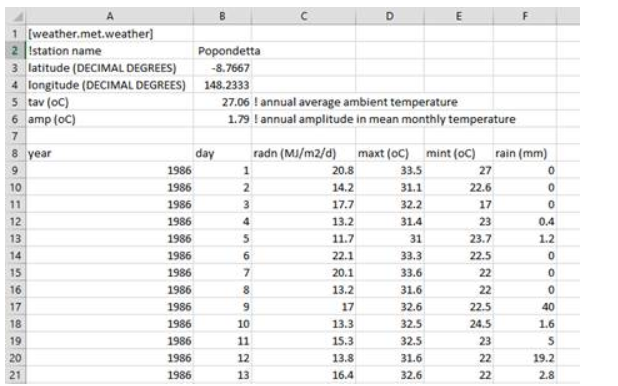
- Click ‘DATA’ on the ribbon menu (at top), and select ‘Text to Columns’. Select ‘Delimited’, click Next, change delimiters to be ‘Space’, check that the Data preview looks correct, and then click Finish. The data should now look like the following.
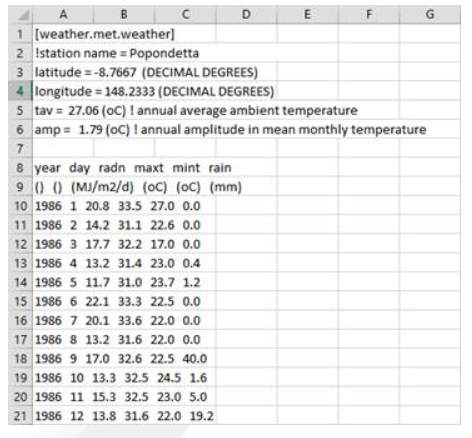
- Measurements should be displayed after the heading which they apply to. The following shows how the data titles and measurements should look after they have been converted.

- Highlight from A1 to A6, click ‘Text to Clolumns’. Select ‘Delimited’, click Next, change delimiters to be ‘Other’, and type an equal (‘=’) in the space provided, and click Finish:
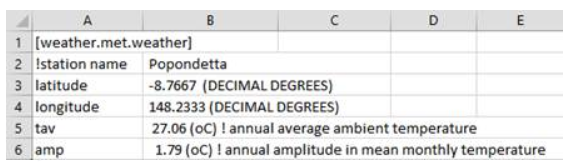
- Edit the ‘latitude’ and ‘longitude’ rows (3 and 4) so that the ‘(DECIMAL DEGREES)’ is moved to be after the title, and the values are on their own in column 2:

- Edit the ‘tav’ and ‘amp’ rows so that the measurement is displayed with the title (name), and that the commenting, including the exclamation (!) is in column 3. Column 2 should only contain the values.
- Note that tav and amp are optional - if not specified, APSIM will calculate them internally.

The worksheet should now be complete.
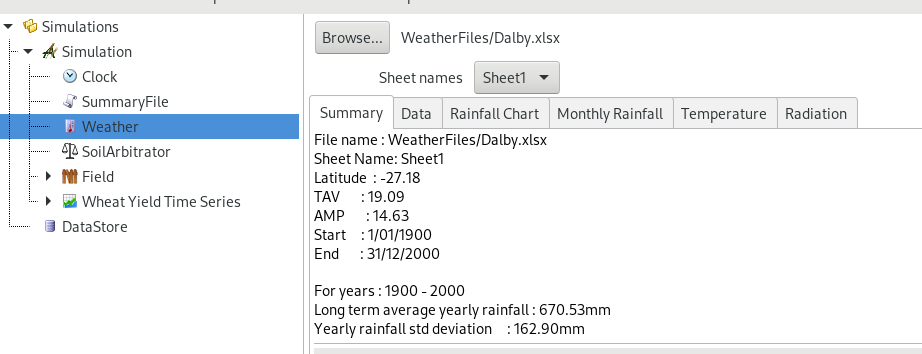
Note: when using the excel file in APSIM, the sheet name must be specified: