Move model to release
Once a model has been approved by the APSIM Initiative it can be moved into the release.
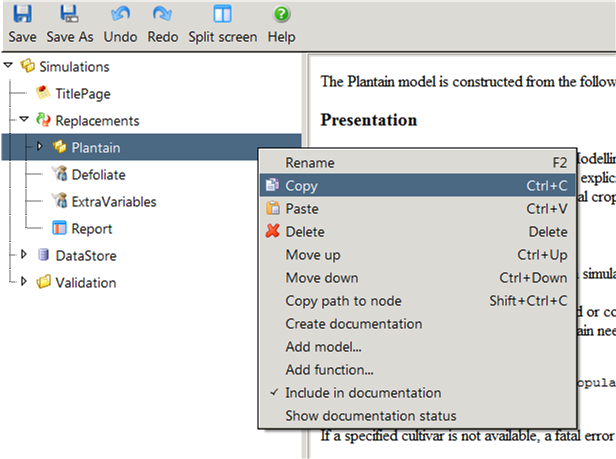
- Copy the plant model node from the Replacements node in the prototype simulation

- Paste this into a text editor and save as a json file into ApsimX\Models\Resources folder.
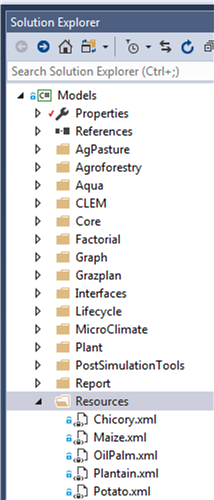
- Add the new file into the APSIMX solution. In VisualStudio, use the Solution Explorer tab
to locate Model\Resources in the Models project, right-click on Resources to open a pop-up menu,
select Add>Existing Item. Navigate to the folder where the newly created json file was saved,
select it and click Add. The file should now appear under Model\Resources.

- Locate it and right-click, select properties and change Build Action to ‘None’.
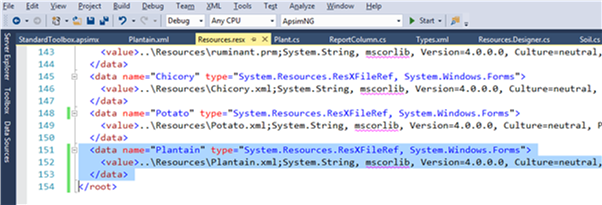
- Add a reference to the model as an Apsim resource. For this, open the Resources.resx file
(locate under Model/Properties). Copy a node from a similar existing model and change the name
and value to match the new model. Note that this is case sensitive.

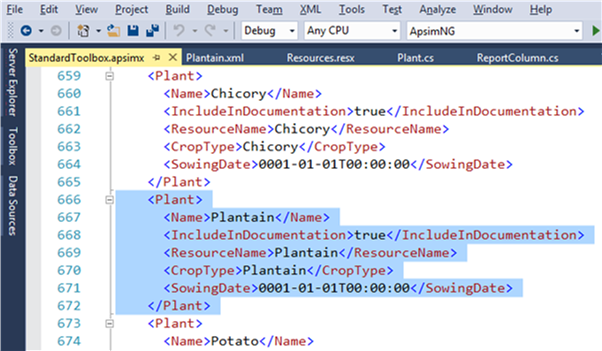
- Add reference to the model into the standard toolbox. For this, open ApsimNG\Resources\Toolboxes\StandardToolbox.apsimx
in a text editor. Copy a node of an existing similar model and modify it with references to the new model.
Note that this is also case sensitive.

- Add icons for the model. For this, create png images, with the same name as the model, and save in ApsimNG\Resources\LargeImages (32pixels) and ApsimNG\Resources\TreeViewImages (16 pixels). These should be added to the solution (as per step 3 and 4 above). After adding the images, locate them in Solution Explorer, right click on each, select properties and change Build Action to ‘Embedded Resource’.
- Add an example simulation to Examples folder.
- Copy the prototype simulation from the Prototype folder into its own folder in ApsimX\Tests\Validation. In this simulation, delete the model node in Replacements.
- Delete the model’s simulation and folder from the Prototypes folder
- Commit all, and create a Pull Request to have all these changes merged into the APSIM repository.